bsp
加密服务部署说明
1. 说明
本文用于指导部署 Java 加密服务(cryptographic-service-0.0.1-SNAPSHOT.jar、service-0.0.1-SNAPSHOT.jar),并在 Cache/IRIS 中完成调用配置。
2. 部署环境要求
- 硬件要求:无特殊要求,可部署在 ECP 服务器或其他内网可访问服务器。
- JDK 要求:JDK 1.8
- 服务端口:
28086、28087- 确保服务器端口已开放:请联系项目对接的信息科协助完成端口开放操作。
- 访问权限说明:该端口仅限于内部通信,不涉及任何第三方外部访问。
- 开放必要性:开放此端口旨在发布 Java 服务。若未开放,IRIS 系统将无法成功调用该 Java 服务。
- 文件安装包百度网盘下载链接:
通过网盘分享的文件:加密服务 附件.zip
链接: https://pan.baidu.com/s/19fY5JIaYM5h1ARLbzeJW0A?pwd=1234 提取码: 1234
2.1 Windows
- JDK 安装:可使用附件中的
jdk1.8.0_251.zip。jdk1.8.0_251.zip解压后到D:\根目录- 如果没有
D盘 可以解压到任意路径。
2.2 Linux
- JDK 安装参考:
3. 部署 JAR 服务
cryptographic-service-0.0.1-SNAPSHOT.jar该jar包为JAVA标准加密 发布的端口为28087service-0.0.1-SNAPSHOT.jar该jar包为JAVA非标准加密 发布的端口为28086
3.1 Windows 部署
-
将
cryptographic-service-0.0.1-SNAPSHOT.jar、service-0.0.1-SNAPSHOT.jar放到D:\根目录。

-
进入 JDK 的 bin 目录,清除文件路径信息后,输入cmd,运行java命令。
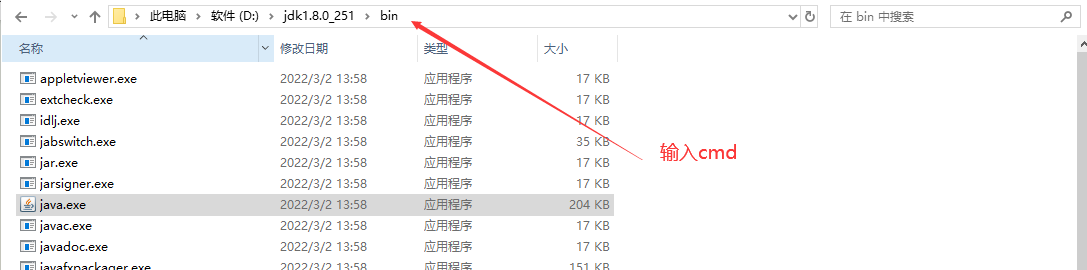
-
分别执行
java启动命令:java -jar d:\cryptographic-service-0.0.1-SNAPSHOT.jar java -jar d:\service-0.0.1-SNAPSHOT.jar -
启动成功后,出现 Started ServiceApplication in x.xxx seconds 表明已经启动成功。类似如下输出:
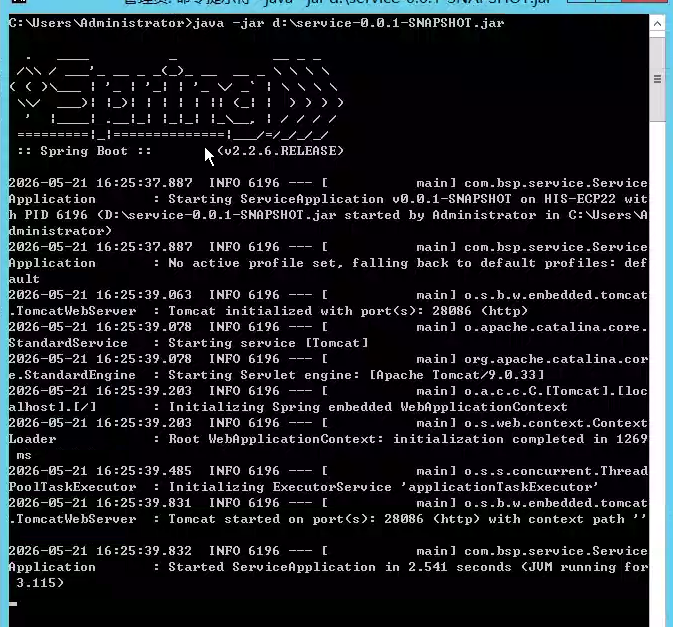
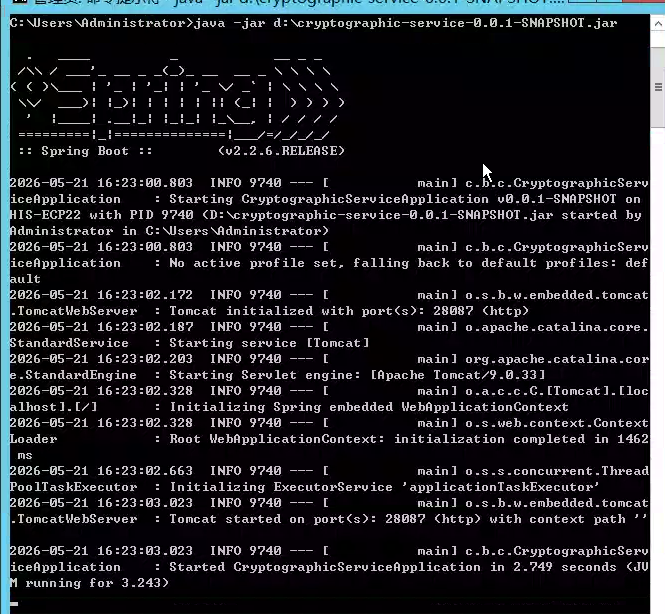
注意:直接在命令行启动时,关闭窗口后服务会终止。
3.2 Linux 部署
-
上传
cryptographic-service-0.0.1-SNAPSHOT.jar、service-0.0.1-SNAPSHOT.jar到:/dthealth/app/dthis/web/hisbase/bsp- 若目录不存在请先创建。
- 若存在且有这两个jar包,则覆盖更新。
-
确认已安装 JDK 1.8(可使用附件
jdk-8u271-linux-x64.tar)。 -
JDK1.8安装成功后,在Linux 的shell执行如下代码:(前台启动,用于首次验证):
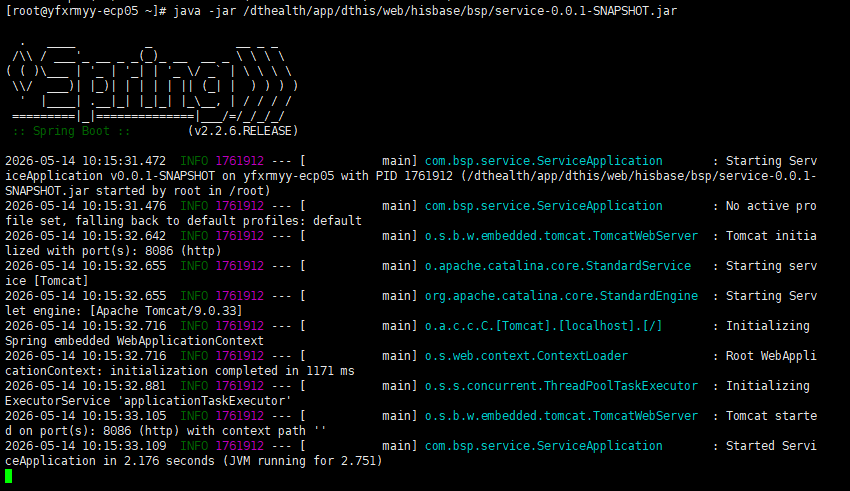
java -jar /dthealth/app/dthis/web/hisbase/bsp/cryptographic-service-0.0.1-SNAPSHOT.jar java -jar /dthealth/app/dthis/web/hisbase/bsp/service-0.0.1-SNAPSHOT.jar -
启动成功后,出现 Started ServiceApplication in x.xxx seconds 表明已经启动成功。类似如下输出:
-
(可选)后台启动(建议接口验证通过后再做):
 nohup java -jar /dthealth/app/dthis/web/hisbase/bsp/cryptographic-service-0.0.1-SNAPSHOT.jar > /tmp/javalog.txt 2>&1 &
 nohup java -jar /dthealth/app/dthis/web/hisbase/bsp/service-0.0.1-SNAPSHOT.jar > /tmp/javalog.txt 2>&1 &
可通过
/tmp/javalog.txt确认服务启动状态。若系统重启,需重新启动服务。 -
(可选)配置开机自启(建议接口验证通过后再做):
- 将附件中的
myjavaapp放到/etc/init.d/

-
依次执行:
sudo chmod +x /etc/init.d/myjavaapp sudo chkconfig --add myjavaapp sudo service myjavaapp start sudo chkconfig myjavaapp on - 查看
/tmp/javalog.txt,确认启动成功:

注意:服务发布成功后,请勿停止该进程,否则接口调用会失败。
- 将附件中的
4. Cache/IRIS 导入与配置
-
将附件中的加密工具类导入目标 Cache/IRIS 数据库,要部署哪个命名空间就导入哪个命名空间。
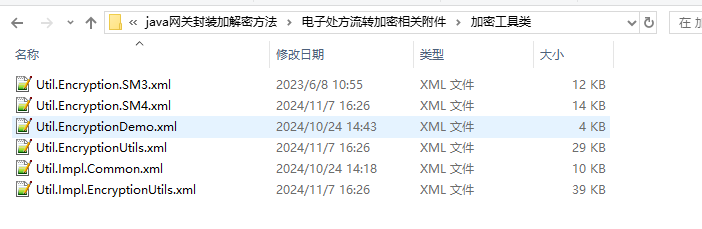
- 导入时选择:
- 勾选所有文件
- 勾选编译导入项目
- 点击
OK
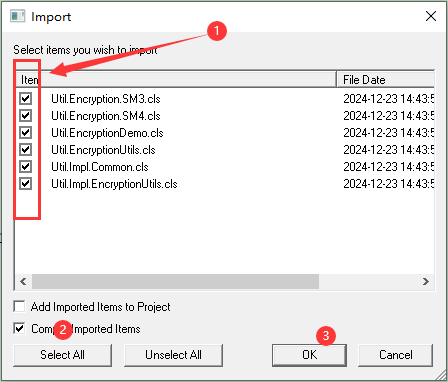
-
若系统中已存在同名类,可直接覆盖更新。
- 导入完成后,打开
Util.Impl.EncryptionUtils,修改服务地址参数:
Parameter NonStandardAlgUrl = "http://localhost:28086";
Parameter StandardAlgUrl = "http://localhost:28087";
将 localhost 改为 JAR 所在服务器 IP,例如:
Parameter NonStandardAlgUrl = "http://192.168.1.1:28086";
Parameter StandardAlgUrl = "http://192.168.1.1:28087";

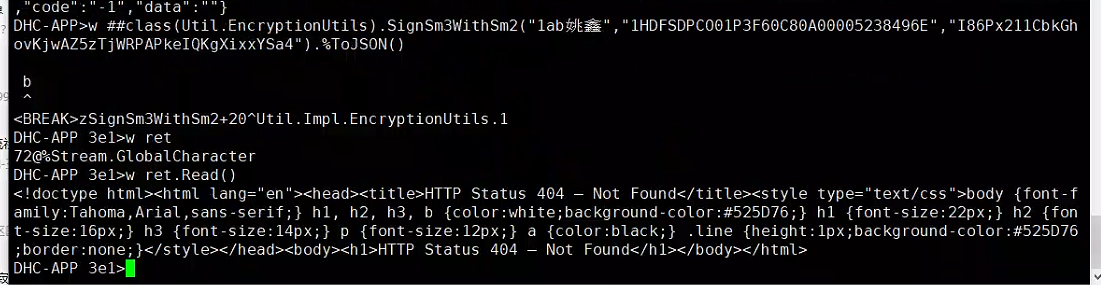
5. 验证方法
- 验证JAVA标准加密 选择该链接内任意方法有返回值即可 JAVA 加密服务 - 标准加密
- 验证JAVA非标准加密 选择该链接内任意方法有返回值即可JAVA 加密服务 - 非标准加密
验证成功后在Terminal中执行以该方法用于部署程序:
w ##class(Util.EncryptionUtils).Deploy()
运行后提示该内容即可:
DHC-APP>w ##class(Util.EncryptionUtils).Deploy()

Compilation started on 05/21/2026 11:03:06 with qualifiers 'cuk'
Removed deployed classes from compile list
Class Util.EncodingUtils is up-to-date.
Class Util.Encryption.BigIntBytes is up-to-date.
Class Util.Encryption.DES is up-to-date.
Class Util.Encryption.MD5 is up-to-date.
Class Util.Encryption.Primitives is up-to-date.
Class Util.Encryption.RSA is up-to-date.
Class Util.Encryption.RSAPrimitives is up-to-date.
Class Util.Encryption.SM2 is up-to-date.
Class Util.Encryption.SM2Callout is up-to-date.
Class Util.Encryption.SM2EmbeddedPython is up-to-date.
Class Util.Encryption.SM2Shell is up-to-date.
Class Util.Encryption.SM3 is up-to-date.
Class Util.Encryption.SM4 is up-to-date.
Class Util.Encryption.TripleDES is up-to-date.
Class Util.EncryptionUtils is up-to-date.
Class Util.Impl.EncodingUtils is up-to-date.
Class Util.Impl.EncryptionUtils is up-to-date.
Compilation finished successfully in 0.154s.
1
6. 常见问题
-
从 Word 复制后出现语法异常
原因通常是复制带入了特殊字符。建议手动输入关键命令或代码。

-
调用报错,疑似 IP/端口不通
请确认第 4 节中的 URL 配置正确,并在命令行使用telnet测试目标 IP 与端口连通性。

联系信息科放开防火墙的28086,28087端口,可运行以下命令查看防火墙。
- 运行查看端口命令:
firewall-cmd --list-ports - 运行永久放行(重启生效)命令:
firewall-cmd --permanent --add-port=28086/tcp,firewall-cmd --permanent --add-port=28087/tcp - 运行重载生效命令:
firewall-cmd --reload - 然后在运行查看端口命令,看看有没有放开8086端口:
firewall-cmd --list-ports
- 运行查看端口命令:
-
调用失败,疑似服务未启动
请先确认 Java 服务进程是否正常运行。
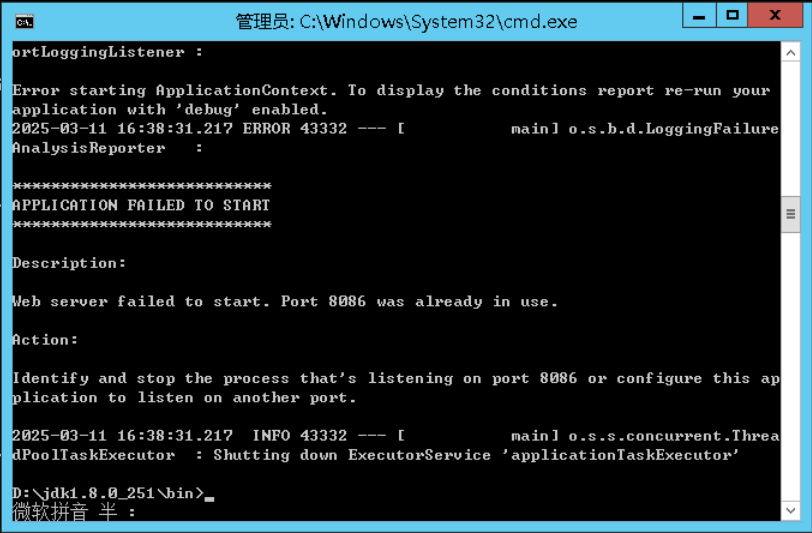
-
提示端口占用
错误示例:Web server failed to start. Port 8087 was already in use.
处理建议:更换端口、停止占用进程,或重启服务器后重试。 -
Q:有多台 ECP,是否每台都要部署?
A:不需要。部署一台内网可访问、运行稳定的服务器即可。
-
Q:方法返回与文档示例不一致?
A:请在Terminal中执行示例命令,再对比结果。
